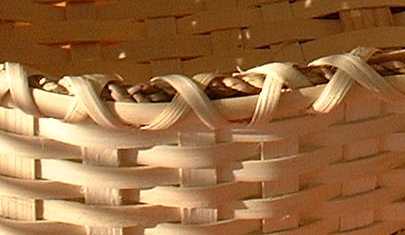
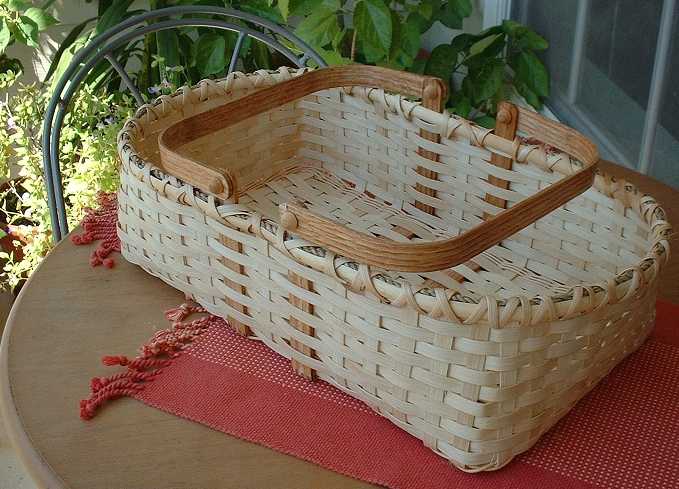
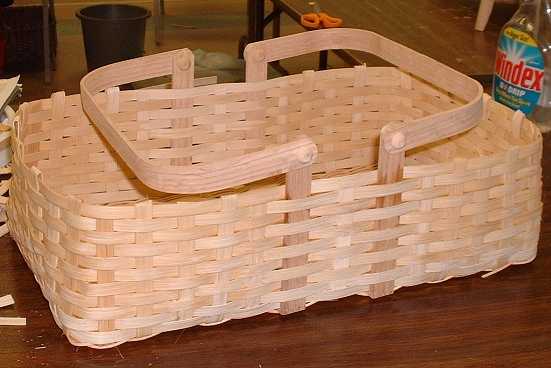
Pie Basket
I attended a basket weaving class at Leasure Learning in Houston, to make a pie basket. I had never done a basket before. The basket was a good choice for a beginner,
however I do not recommend this class. The teacher was an experienced basket weaver but without much teaching skills.
I wrote this pattern from the notes and pictures I took during the class, as we were not given a pattern to begin with.
It took 6 hours to complete.
Supplies
The Flat reed have a Wrong and a Right side, the Wrong is hairy and the Right is smooth. A student told me that most
of the time the wrong side is on the outer of the coil, it seemed to work well. Another good idea is to bend one end in both directions
and see which bend is cleaner, if the wrong side is outside it will be hairy.
The 'Flat' and 'Oval" refer to the shape of the reed, flat on one side, oval on the other.
- 9 32'' of 1/2''Flat-Flat: horizontal, mark the wrong side center
- 11 27'' of 1/2''Flat-Flat: vertical, mark the wrong side center
- 8 23'' of 1/2''Flat-Falt: filler for the bottom, mark the right side center
- 11 X 3/8''Flat-Flat for the side fillers, X will be measured later
- ... Round for the twine around the bottom
- 58'' of 1/2''Flat-Oval for the outside rim
- 57'' Twisted Seagrass to mask the edge, between the 2 rims
- 56'' of 1/2''Flat-Oval for the inside rim
- something else to wrap the rim
- 2 handles
The side is important, when you need to bend the reed the hairy side must not be outside of the bend else it will be ugly.
The project should be kept lightly wet in the area you are working with, else it would break. Too wet it would get hairy.
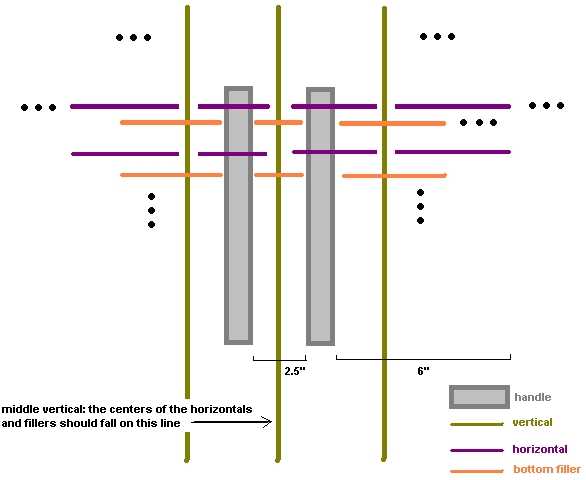
Step 1: The Base
The bottom is defined by the location of the handles, 2,5'' apart. The verticals, horizontals and the bottom fillers are weaved 'above-under-above...'. The marked
sides should face you.
Check the squareness by making sure that the 2 diagonals are equal. Use all verticals, horizontals and bottom fillers.
The verticals and horizontals are used for the sides of the basket. However the bottom fillers have to be 'finished' with crow-feet.
(The fillers only).
To do the crow-feet, return the basket, wet the fillers, bend them carefully (ugly side should be inside the bend), cut them in half and tuck them as described:

To finish the bottom, make several rows of pairing with one round weaver (3 rows
looks great):
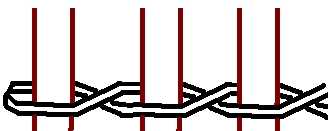 (pairing with one weaver)

Step 2: The sides
Wet the horizontal and verticals and bend them to define the sides. Measure how much length you need to make one turn and cut your 11 fillers.
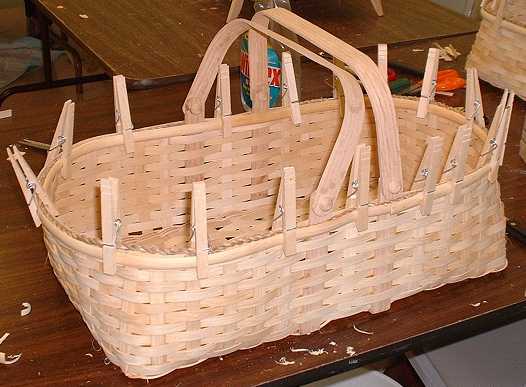
Make one lap with each filler, overlapping at 3-4 spokes on each end, hide the ends. Pinch each corners while keeping i finger space between the 2
corner spokes. Use clothes-pins to keep in place.
Once you have done your 11 rows (~5'), or arrived at the handles, cut the inside spokes and tuck the outside spoke inside (wet before bending).
Step 3: The rim
The rim is a sandwich : seagrass between Flat-Oval. First place the seagrass, keep it in place with the clothes-pins. Then the inside and the outside rims.
Where the rims overlap, thin them to keep the same thickness.
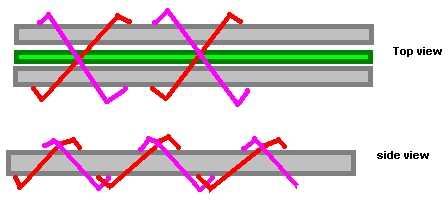
Wrap the sandwich with a X pattern, go one way first, then the other to have all X crossing in the same direction: