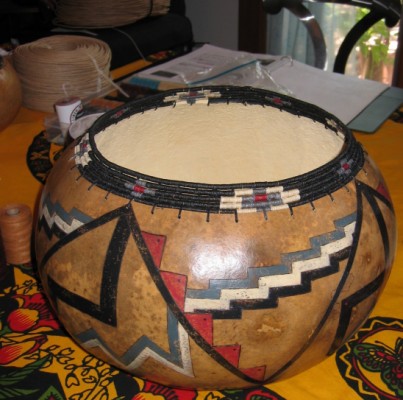
 In August 06 Darla Hines taught our Gourd-Patch how to coil a rim using paper rush and waxed linen. The gourd on
the left is one of her creations.
In August 06 Darla Hines taught our Gourd-Patch how to coil a rim using paper rush and waxed linen. The gourd on
the left is one of her creations.
Coiling
In August 06 Darla Hines taught our Gourd-Patch how to coil a rim using paper rush and waxed linen. The gourd on
the left is one of her creations.


Supplies
- A decorated and finished gourd.
- Paper rush 4/32 or Danish cord
- 4ply Waxed linen, 2-3 colors if you plan on making a design. Approximately 12.5 inches of thread make 1 inches of coiling.
- Tapestry needle #20 or #22, one per color.
- Sharp scissors.
Preparation
- Sand and color the rim
- Decide what design you want to make and make a drawing on a sheet of paper. Count the number of rows and holes needed
- Drill holes with 5/64 bit (second drill bit in the Dremel box), 3/16 inches below the rim. The number of holes depend on your design, they should be 1/2 to 3/4 inches apart.
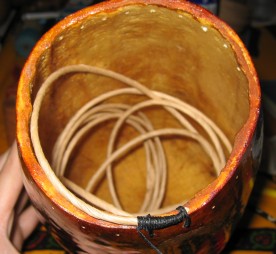
- Measure the circumference of the rim and multiply by the number of rows. This will give you the length of paper rush that you will need. Add a few inches to be safe.
Starting
Note: The drawings below are from an inside-out coiling, going right to left. You can coil from left to right, and/or thread your needle from the outside of the gourd toward the inside, there are no rules as long as it works for you. Coiling from the outside to the inside is easier if the opening of your rim is small. This is just a personal choice, experiment and do what works best for you. The stitches are the same, the result is the same, the only difference is how you do your very first stitch.- Cut one end of the paper rush in a long slant (1 inch).
- Hold the slanted end on top of the rim, with the end slightly at the right of a hole (1/4 inc). The slanted side should face up.
- Put the threaded needle in the hole from the exterior toward the interior. Leave a 1 1/2 inches tail.
- Follow the step#1 below if you coil from the inside toward the outside, or follow the step #2 if you coil from the outside toward the inside of your gourd:
- Put the needle back into the same hole from the interior to the exterior, catching the tail in a loop. (see drawing below)
- Wrap the thread around the core, overlapping the tail and put the needle back into the same hole from the exterior to the interior, (see little square in the drawing)
- Start wrapping the paper core toward the left, catching the lose tail inside the coiling as you go
- Once you reach the next hole, thread the needle twice into the hole to anchor your coiling
- Make sure the coiling is tight, the interior should be as pretty as the exterior.
- When you reach your starting point, include the slanted tail that was left at the beginning into your coiling and move up.
Changing colors/thread
About five stitches before you need to change color, start wrapping the new thread into the coiling. Then lay the old thread to the left and coil over the old thread with the new thread. Cut the excess unless you want to carry your old color in the coiling to use it later in a pattern.
Anchoring one row to the previous one
Regularly the coiling must be anchored to the row below. Much like the first row was anchored to the gourd. Several stitches can be used:- lazy squaw: Coil around the previous row for 2 stitches.
- figure eight or Navajo stitch
- Variation on the "figure eight"
Again, the drawings have been made for an inside-out coiling, just reverse the direction of your thread if you coil outside-in.
Ending
You should finish just above where you started and then overlap that point by about 1/2 inch. Cut the end of the paper core on a long slant, facing down. Continue coiling until you are just at the point directly abover where you began. Wrap together both the top core and the row beneath until the core thins to a point and disappears into nothing. Wrap a couple of times past this point, pulling tautly enough to make the stitches disappear.Tips
- Coil your paper core inside your gourd:
- Keep one needle on each color thread.
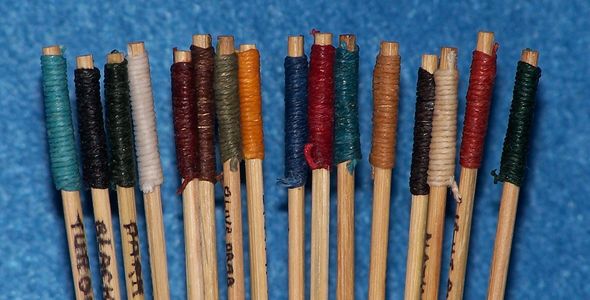
- How to choose your colors: A great tip from Susan Vyskocil
I ordered various colors but was having great difficulty selecting the ones to combine for each project. I tried using the sample card that I purchased but that didn't help much. The color combinations I wanted to try were too far apart on the card (and way too small) to get a good idea of what they would look like together. I tried holding the spools together but still wasn't happy. Finally, I came up with wrapping the linen on bamboo skewers (used for cooking). It worked great!! It gives me a better "visual" of what the finished product might look like. The wrapped skewers are just about the same size as the wrapped core that I am using on my gourds. (Note: I have written the names of the colors on each skewer.)Small dowels should work just as well.